LaTeX with Overleaf
January 5, 2017
LaTeX has been around for 30+ years (first release was in 1985) and is still the champion of typesetting, especially scientific typesetting. The language itself is fixed but the framework has undergone many expansion by third-party packages. So when people talk about LaTeX they usually mean the whole framework with all the packages without which you can’t even compile the most basic papers. This is a burden especially for academic novice like myself one year ago. Lucky me I’m a computer geek so learning how to install, upgrade and use LaTeX was a matter of a few hours Googling. But even within academics, sharing a LaTeX document remains a pain in the arse.
Overleaf is an online compiler that solves all those problems. When combined with Mendeley and Git they form a “dream team” that can significcantly improve your productivity. This article will show you how to set them up and and work with them in the most effective way.
Full disclosure: I am an official Overleaf advisor of Massey University (you can find me here). This is a voluntary role and I don’t get any financial incentive to advertise for Overleaf. I also tried other similar services (such as ShareLaTeX and Papeeria) but eventually settle at Overleaf. You should try all other options as well, but I have no in-depth experience to talk about them.
An online tool for offline work
Overleaf is more than just an online LaTeX compiler (a computer geek can create one with Gitlab’s pipeline as described here), it is foremost a repository for LaTeX documents with links you can quickly share. Secondly, it allows real-time collaboration between multiple users, similar to what Google Drive or Office 365 provide. This feature once allow me and my supervisor to finish a paper moment before the submission closed. Third, its incorporation of Git allows you to version control your writing. And finally, Overleaf can access a reference managing service such as Mendeley, Zotero and CiteULike via API calls, so you don’t have to manage your bib file manually.
These features are very useful when collaborating with another writers. However, most of the time I write stuff alone and working online is an unnecessary complication. First, Overleaf compiles your writing every few seconds, it’s pretty troublesome when you are in the middle of writing an unfinished piece of code and it gets compiled, which certainly will result in an error. This can be overcome by selecting manual compilation instead of automatic. Second, the web-based editor of Overleaf is far from perfect. It lacks a lot of features that a proper Tex editor provides, such as auto completing user-defined code, complicated math equations and table edition. Third, the integration of Overleaf with Mendeley is not automatic: first you have to sync the Mendeley application with its online repository, then you have to refresh Overleaf to update the bib file. That’s too many steps compare to what you can do following my article here, which doesn’t require you to do anything. And finally, everytime overleaf compiles your document it’ll make a commit to the Git repository. This is fine if you don’t care about Git, but if you do, it’ll clutter your repository with lots of “Updated on Overleaf” commits. In contrast, I want to have total control of the commits, such as having meaningful commit message and make commit only when reaching a milestone.
In this article I’ll only write about using Overleaf together with offline tools. Its online interface remains essential for sharing and collaborating when needed, but most of the time when writing alone, you should do so offline, and occasionally commit your change to Overleaf.
Tools that you need
- You will need an account on Overleaf, obviously. Check with your university if they have agreement with Overleaf to provide free Pro accounts for students and faculty members. In case they don’t, you can always sign up for a free account with 100 MB storage and then earn your way for larger space (See here for details).
- You need Mendeley (forget Zotero, and CiteULike, they aren’t even close) and set it up according this article.
- Install a TeX compiler (Follow the instructions here) as well as a TeX editor (I highly recommend TeXStudio).
- Install Git
- On Windows, use Git Bash for command line interface - Don’t torture yourself with Windows’ built-in console (CMD). Git Bash is available after installing Git and you can open a Git Bash window by right-clicking on an empty place on the desktop and choose Git Bash.
Alternatively, install
The pipeline
Initiate a new document
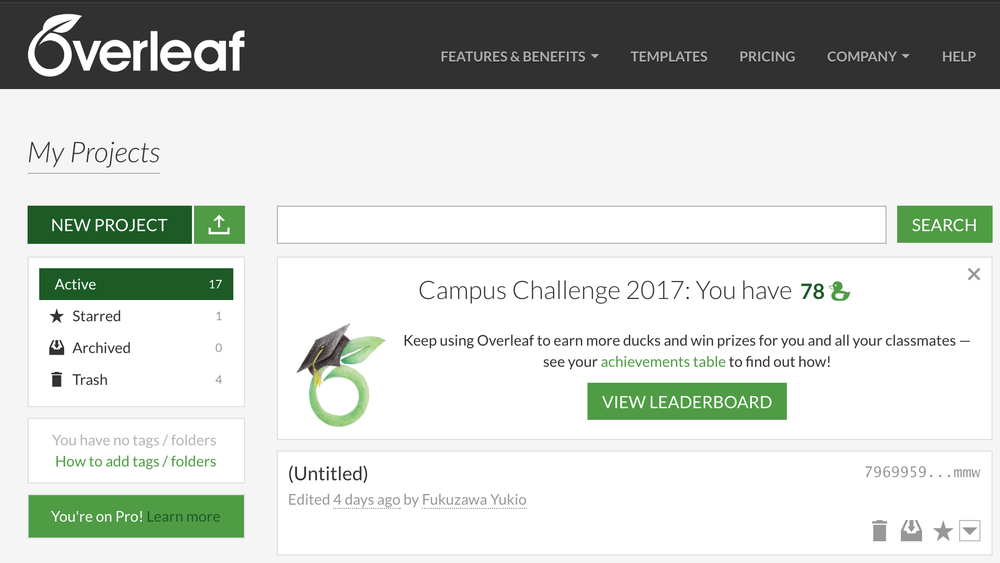
It is imperative that you initiate a LaTeX document from Overleaf first, so that the repository gets set up correctly at the beginning. Otherwise, you’ll regret it. Navigate to Overleaf.com and click on “New Project”, as following:
Clone the project to your computer
Then, open the new document, click on “Share”, you’ll see the link to it’s Git repository.
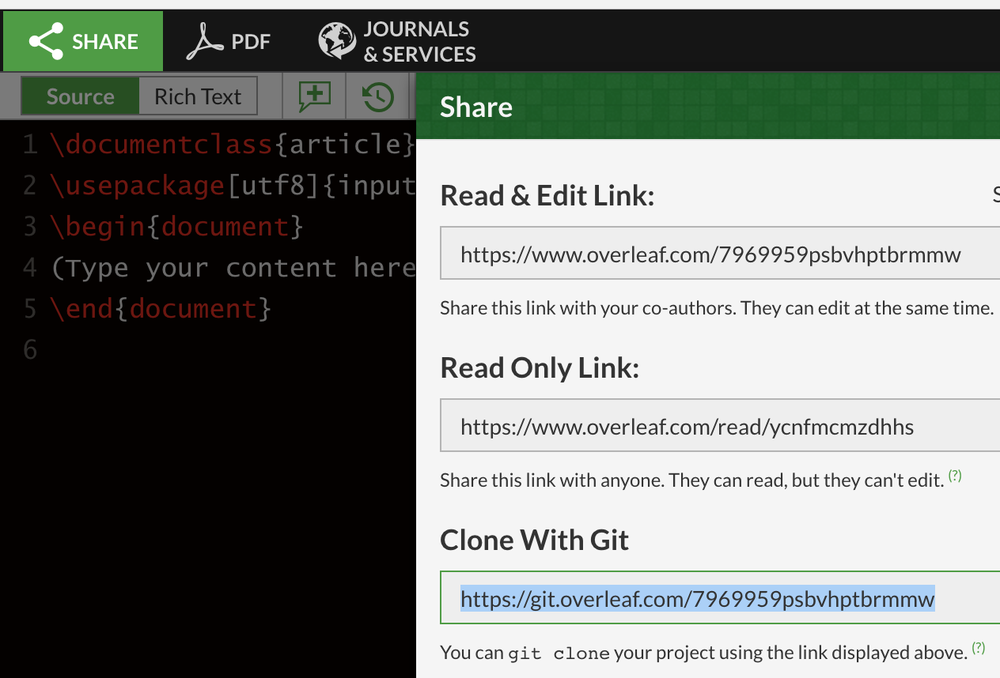
Now, open a console window and clone the repository to your computer with the following command:
git clone https://git.overleaf.com/7969959psbvhptbrmmw my-new-document
Of course you’ll have to replace https://git.overleaf.com/7969959psbvhptbrmmw with the actual link and my-new-document with any name you want. Essentially the new document will be cloned into folder my-new-document. When you open it, you’ll see the following content:
my-new-document/
|-- .git/
`-- main.tex
Some housekeeping to keep it clean
Now, if you set up Mendeley correctly, then there will be a library.bib file in that folder as well. You might not see the .git folder because it is hidden. But don’t worry about that. What you need to do immediately is to create a file named .gitignore which tells Git not to care about certain files, because the compilation of LaTeX creates a lot of temporary files.
*.acn
*.acr
*.alg
*.aux
*.bbl
*.bcf
*.blg
*.dvi
*.fdb_latexmk
*.fls
*.glg
*.glo
*.gls
*.idx
*.ilg
*.ind
*.ist
*.lof
*.log
*.lot
*.maf
*.mtc
*.mtc0
*.nav
*.nlo
*.out
*.pdfsync
*.ps
*.run.xml
*.snm
*.synctex.gz
*.toc
*.vrb
*.xdy
*.tdo
.DS_Store
*-blx.bib
tmp/
*.upa
*.upb
cleanup.sh
*.dpth
*.auxlock
*.markdown.*
_markdown_main/
That’s a huge list isn’t it? Now, once you do this, Git will ignore them, but they’re still there. You can also ignore them but I find it annoying to have all those temporary files sitting there contaminating my folder’s structure. Temporary files can also mess up with the compilation process, so I suggest you create a script that cleans them up for you automatically. Here’s the content of my cleanup.sh
#! /bin/bash
find . -name "*.aux" | xargs rm -rf
find . -name "*.bbl" | xargs rm -rf
find . -name "*.bcf" | xargs rm -rf
find . -name "*.blg" | xargs rm -rf
find . -name "*.log" | xargs rm -rf
find . -name "*.run.xml" | xargs rm -rf
find . -name "*.synctex.gz" | xargs rm -rf
find . -name "*.fdb_latexmk" | xargs rm -rf
find . -name "*.toc" | xargs rm -rf
find . -name "*.out" | xargs rm -rf
find . -name "*.fls" | xargs rm -rf
find . -name "*.dpth" | xargs rm -rf
find . -name "*.auxlock" | xargs rm -rf
find . -name "*.lof" | xargs rm -rf
find . -name "*.dvi" | xargs rm -rf
find . -name "*.markdown.*" | xargs rm -rf
rm -rf main.synctex.gz\(busy\)
rm -rf _markdown_main
The optimal project structure
Now, you’re all set to get your document compiled and committed. If it’s a big document, such as a thesis, you might want to set it up in a more organising way than having everything inside main.tex. My typical project structure will be as following:
my-new-document/
|-- .git/
|-- chapters/
|   |-- chapter-1.tex
|   `-- chapter-2.tex
|-- figures/
|   |-- figure1.pdf
|   |-- figure1.pdf_tex
|   |-- figure2.pdf
|   `-- figure2.pdf_tex
|-- .gitignore
|-- main.tex
|-- setup.tex
`-- library.bib
setup.texis where you put the preamble, which include all the packages, configurations, and custom commands/definitions.main.texis where you setup the overall structure. The first two lines are compilation directives that instruct the editor to compile withpdflatexandbiber% !TEX program = pdflatex % !BIB program = biber \input{setup} \title{My Thesis} \author{John Doe} \begin{document} \include{chapters/chapter-1} \include{chapters/chapter-2} \printbibliography \end{document}chapter-xxx.texis the actual content of the chapter. All the chapters should begin with this directive:% !TEX root = ../main.texso that you can compile from any place, otherwise you’ll need to go back to
main.texto recompile the project.figures/is where you put all your graphics, logos, figures
An actual project that follows this structure is given in this article.
So, how does that fit together?
On a typical day you will edit your document in your favourite TeX editor. You add more chapters to chapters and graphics to figures, compile and enjoy the flashy result. In the end of the day, you can commit all the change to Overleaf with a few simple commands:
./cleanup.sh # To remove all temporary files
git add -A # Add all the changes to the local git
git commit -m "Finish chapter 1 and a bit of chapter 2" # Store the change locally
git push # Deliver the change to Overleaf
The git push command might fail if someone whom you share your project with modify the document during the day (simply clicking on the document on Overleaf.com somehow will also create an empty commit - this is very annoying and I hope they fix it soon), in which case you need to git pull to get the changes on the remote server, then git push again. After setting all this up, you will be using Overleaf as an online repository instead of say, Github. But it preserves the ability to share and collaborate with other people if necessary. This is now I wrote my papers: mostly by myself offline, commit it online so that my supervisor can view and fix my writing. When necessary (such as before a submission deadline), we both sit down with our own computer and write the document simultaneously.
Compare Overleaf and other services
Both ShareLaTeX and Papeeria provide pretty much the same services as Overleaf, but the knock-out feature that draws me to Overleaf is that it provides Git integration for free accounts. With ShareLaTeX you have to pay for it and with Papeeria you can link to a public repository, which I really don’t like. For all fairness, Overleaf’s Git repos for free accounts are also public, but they’re not indexed and there is no way one can find it from a search engine.
If you like this post, please consider sharing with , , , , or leave me a comment below.